Exclusive discounts on roses for delivery!
The Unbelievable Joy of Making Your Own Giant Paper Flowers
Ever been stopped in your tracks by a stunningly large paper flower? That feeling of "I could never make that" is a total myth, because creating these whimsical giants is not only achievable but also incredibly rewarding. This DIY guide will show you how to transform simple paper into a breathtaking floral masterpiece, perfect for adding a touch of wonder to any space or event.
9/3/20255 min read
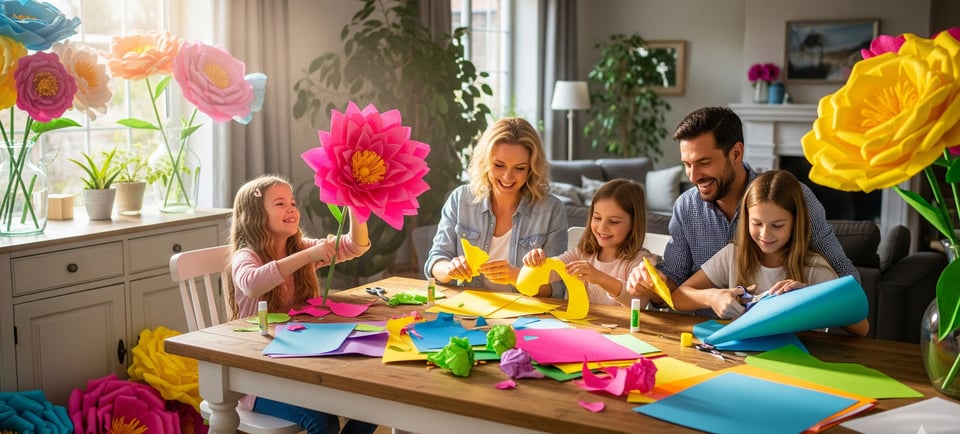
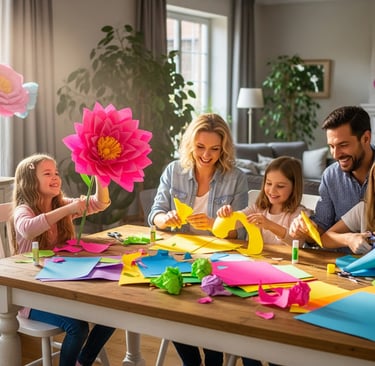
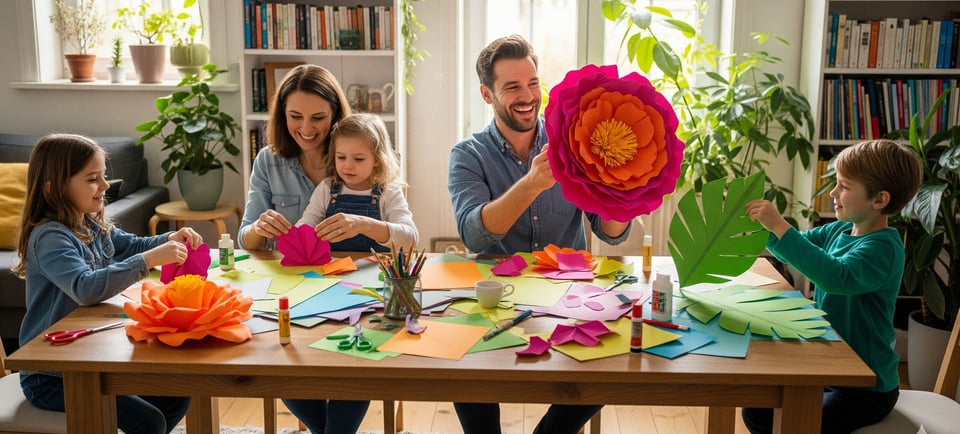
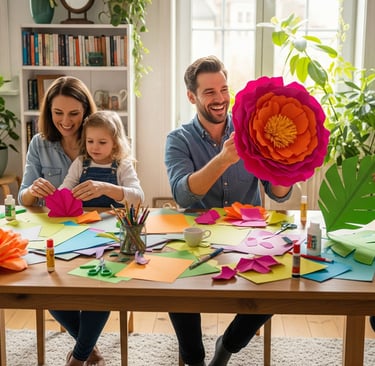
Have you ever walked into a space—maybe a wedding reception, a baby shower, or even just a beautifully decorated storefront—and spotted those breathtakingly large paper flowers? Honestly, they have a way of stopping you right in your tracks, don't they? They're huge, they're gorgeous, and they instantly add a touch of whimsy and elegance. And let me tell you a little secret: that feeling of "Oh, I could never make something that beautiful" is so, so wrong. The truth is, creating your own giant paper flowers is not only totally doable, but it's also incredibly rewarding. It's a fantastic project for a rainy afternoon, a fun way to get your creative juices flowing, and a surefire way to make something truly unique for your home or next big event.
So, let's get into it, shall we? This isn't just about a simple craft project; it's about making something with your own two hands that adds a bit of wonder to the world. Think of it as a form of floral alchemy, turning simple sheets of paper into something spectacular. And the best part? It's much easier than you might think. We're going to walk through this DIY paper flowers tutorial together, from gathering your materials to seeing your beautiful creation come to life.
Let's Get the Essentials: What You'll Need
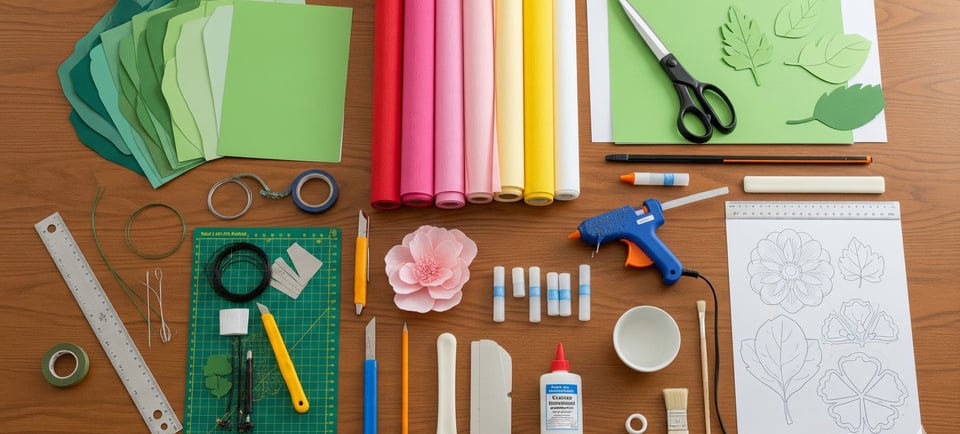
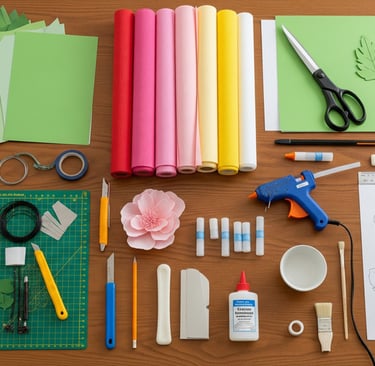
Before we get our hands sticky with glue, we need to talk supplies. You'll find that you probably have most of this stuff lying around already! Seriously. The magic is in the simplicity. The main ingredient, of course, is the paper. For large paper flowers, I’m a big fan of cardstock. The weight—60 to 80 pounds—gives your petals the structure and body they need to hold their shape and stand tall. Plus, a smooth, solid core cardstock gives you that clean, professional look without a lot of fuss.
Now, you have a couple of options for getting your petals ready. If you’re a hands-on type and don't mind a bit of cutting, a good pair of scissors is all you need. But if you have access to a smart cutting machine like a Cricut or a Silhouette, you'll feel like you're cheating—and that's a good thing! These machines can cut out all your paper flower templates in minutes, giving you perfectly uniform petals every time. Honestly, it's a game-changer, especially if you plan to make a whole garden of these blooms.
Beyond the paper and the cutting tool, you'll need a trusty hot glue gun and plenty of glue sticks. This is what brings the whole thing together. For the base, a simple cake board works wonders. It's sturdy, lightweight, and gives you a solid foundation to build upon. Oh, and a little tip from my own experience: always have a few extra sheets of paper on hand. It's like a safety net for those "oops" moments that happen to even the most seasoned crafters.
The Five Steps to a Flawless Paper Flower
Ready? Let’s get to the good stuff. The entire process of making your own handmade flowers can be broken down into five simple steps.
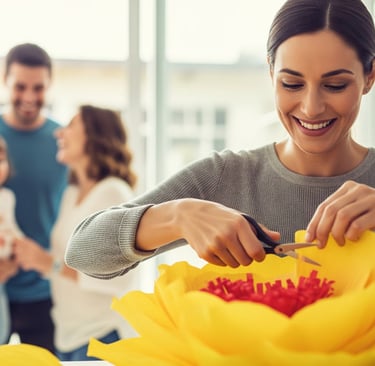
1. Cutting the Petals: A Cut Above the Rest
This is the starting point of your paper crafting journey. Whether you’re cutting by hand or using a machine, follow your chosen paper flower patterns to create the different sizes of petals you’ll need. You'll typically have at least three or four sizes, from the biggest for the outer layers to the smallest for the inner rosebud.
2. Shaping Your Petals: A Little Curl Goes a Long Way
Once your petals are cut, it’s time to give them some life. This is where you create that beautiful, three-dimensional look. Using a pencil, a dowel, or even your fingers, gently curl the edges of each petal. Remember, you want a natural, organic shape, so don’t be afraid to experiment. Nature isn't perfect, and neither should your flowers be!
3. Assembling the Rosebud: The Heart of Your Bloom
This step is where your flower really starts to take shape. For a classic rose, you'll begin by forming the center, or the rosebud. This usually involves wrapping and gluing the smallest petals tightly around each other to create that iconic center. Don't worry if it's not perfect—it just adds to the character of your cardstock flowers.
4. Building the Bloom: Layer by Layer
Now for the most satisfying part. Start with your largest petals and begin gluing them to the outer edge of your cake board base. Overlap them as you go, making sure to fill in any gaps. Work your way inward, using the next size of petal and overlapping them over the previous layer. This is where your DIY flowers go from being a pile of paper to a gorgeous floral masterpiece.
5. Finishing Touches: The Icing on the Cake
Once all your petals are in place, it’s time for a little bit of magic. You can create a sparkly center for a unique twist or add a few leaves to the back to make it look even more realistic. This final step in your paper flower tutorial is all about personalizing your creation and adding those little details that make it your own.

FAQ: How Do You Make Paper Flowers Sturdy?
What kind of paper is best for paper flowers?
The best type of paper for large paper flowers is cardstock. The recommended weight is between 60 to 80 pounds, which gives the petals the structure and body they need to hold their shape and stand up straight. Cardstock with a smooth, solid core will give you a clean, professional look.
How do I hang or display my giant paper flowers?
There are several ways to hang and display your flowers. You can use mounting tape, command hooks, or even wire on the back of the base. If you're decorating a fabric backdrop, you can use pins. For a temporary decoration, be aware that tape may not be strong enough and can fall off over time.
How many sheets of paper do I need to make one flower?
The amount of paper you'll need depends on the size and style of your flower. For a large flower, you might need about 10 to 11 sheets of 8.5 x 11-inch cardstock, while an extra-large flower could take around 16 to 17 sheets. Smaller flowers generally require 1 to 2 sheets for the petals, with additional sheets for the center and leaves. It's always a good idea to have a few extra sheets on hand, just in case.
What tools do I need besides paper and glue?
Besides your paper and a hot glue gun, you'll need a way to cut your petals. You can use a good pair of scissors, but a smart cutting machine like a Cricut or Silhouette can cut perfectly uniform petals in minutes, which is especially helpful if you're making a lot of flowers. You'll also need a sturdy base, like a simple cake board. To shape the petals, you can use a pencil, a dowel, or even just your fingers.